- The HIPS section of a Windows profile lets you protect component object model (COM) interfaces against unauthorized access by processes and services.
- COM interfaces are used by Windows to define how objects interact within a single application, or between applications.
- COM is used as the basis of Active X and OLE - two items which are often attacked by hackers and malware.
- A COM group is a collection of these COM interfaces. This tutorial explains how to create a new COM group, then protect it in the HIPS section of a profile.
Process in brief:
- Login to ITarian
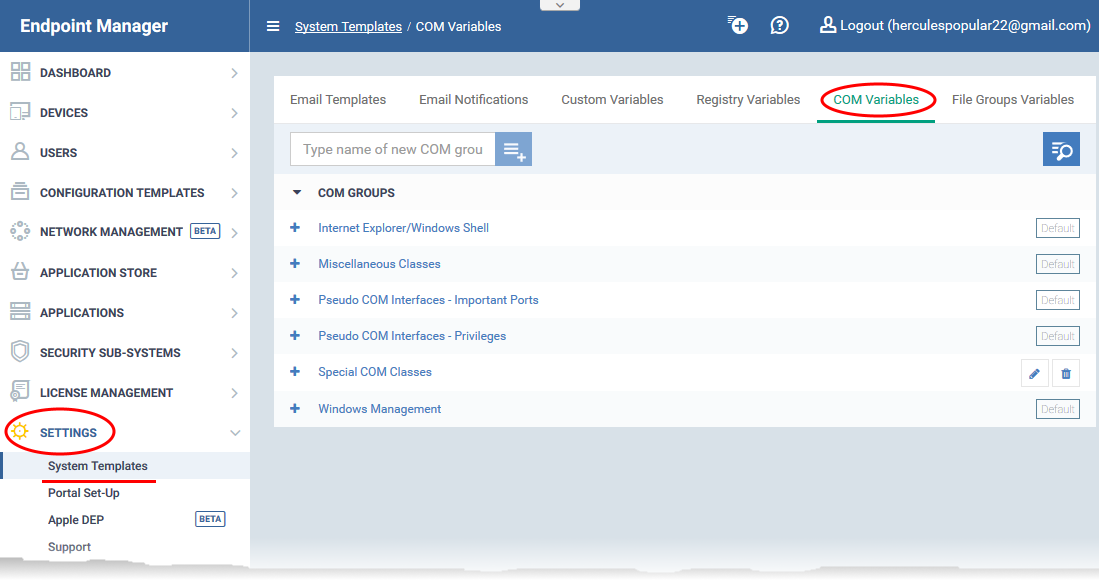
- Click 'Applications' > 'Endpoint Manager'
- Click 'Settings' > 'System Templates'
- Select the 'COM Variables' tab
- Create a COM group containing the interfaces you want to manage
- Click ‘Configuration Templates’ > ‘Profiles’
- Open the Windows profile which is applied to your target devices
- Open the 'HIPS' tab if it has already been added to the profile
OR
- Click 'Add Profile Section' > 'HIPS' if it hasn't yet been added
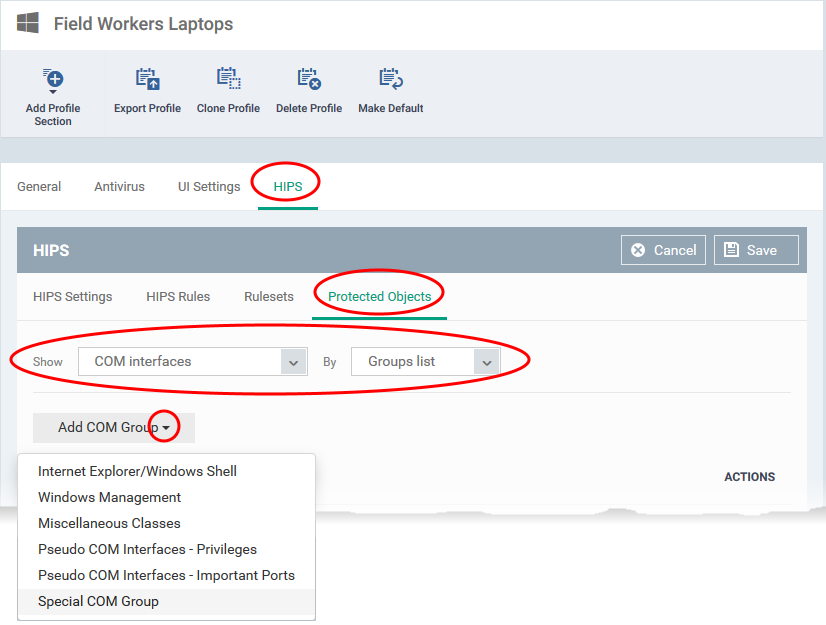
- Click the 'Protected Objects' tab
- Select 'COM Interfaces' in the 'Show' drop-down.
- Select 'Groups List' in the 'By' drop-down
- Click 'Add COM Group' > Select your new group from the list
- Click 'Save'
Process in detail
Step 1 - Create a COM group containing the COM interfaces your want to protect
- Endpoint Manager ships with a set of COM Groups that you can add to ‘Protected Objects' in the HIPS section of a Windows profile.
- If none of the predefined groups cover your needs, then you can create a custom group of specific interfaces.
Create a COM group
- Login to ITarian
- Click 'Applications' > 'Endpoint Manager'
- Click 'Settings' > 'System Templates'
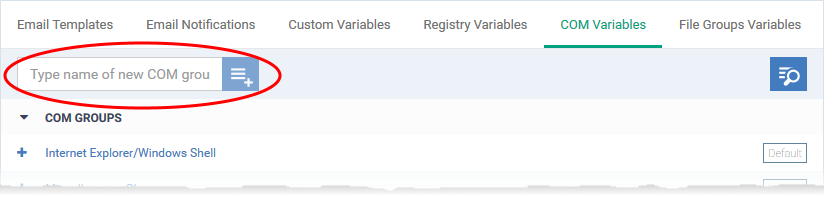
- Click the 'COM Variables' tab:
- Create a name for the COM group then click the
 button
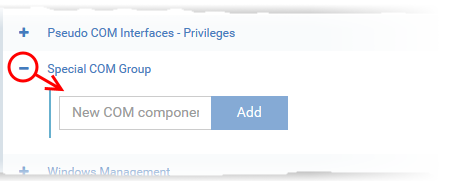
- Enter the COM classes you want to add then click the 'Add' button:

The COM class will be added to the group.

- Repeat the process to add more COM classes to the group.
Once added, the COM group will be available for selection in 'HIPS' > 'Protected Objects' > 'Groups List'.
Step 2 – Add the COM group to 'Protected Objects' in the HIPS section of a profile
The protected objects tab lets you protect COM interfaces or groups against modification by malicious processes.
- Click ‘Configuration Templates’ > ‘Profiles’
- Open the Windows profile applied to your target devices
- Open the 'HIPS' tab if it has already been added to the profile
OR
- Click 'Add Profile Section' > 'HIPS' if it hasn't yet been added
- Click the 'Protected Objects' tab. Then:
- Select 'COM interfaces' in the 'Show' drop-down
- Select 'Groups list' in the 'By' drop-down
- Click ‘Add COM group’ and choose your new group from the list:
- Click ‘Save’ to apply your settings