Click ‘Configuration Templates’ > ‘Profiles’ > open a Mac OS profile > Click ‘Add Profile Section’ > ‘Antivirus’
Background
- The antivirus section of a profile lets you control how the virus scanner in CCS operates on managed Mac devices. There are two main sections:
- Preferences – Configure general CCS settings, update server, password protection, and log settings.
- Antivirus – Has three sub-sections:
- Scanner Settings – Configure options for real-time, manual and scheduled scans. Choose files you want to exclude from scans.
- Scan Profiles – Scan profiles tell CCS which items to scan. You can pick a full or quick scan, or create a custom profile to scan specific areas. Once saved, you can apply a scan profile to any scheduled scan.
- Scheduled Scans - Choose when you want the scan profile to run on managed devices.
- It is essential to add an antivirus section to a profile if you want virus scans on your endpoints.
Add an AV section to a profile
- Log into ITarian
- Click ‘Applications’ > ‘Endpoint Manager’.
- Click 'Configuration Templates' > 'Profiles'
- Open the MAC profile you want to work on.
- Open the 'Antivirus' tab and click 'Edit'
OR
- Click 'Add Profile Section' > 'Antivirus' if it hasn't yet been added
The antivirus settings screen opens.
- Click the following links for help to configure each tab:
- Preferences - General CCS settings, updates, parental control and logs
- Antivirus - Settings for all scan types. Create custom scan profiles and scheduled scans.
- Click 'Save' to apply the section to your profile.
Preferences
- Open the ‘Antivirus’ section of a profile as explained above
- Click the 'Preferences' tab
- The tab has four sub-sections:
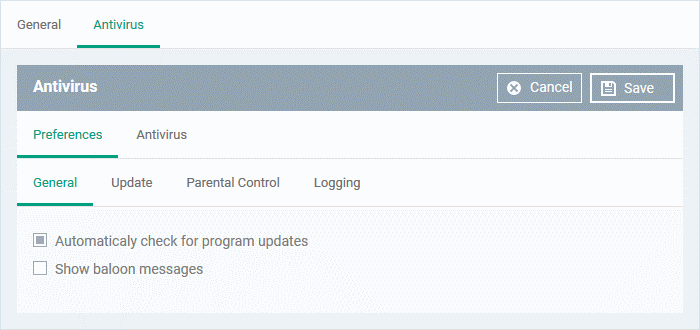
General Settings
- Automatically check for program updates - CCS checks for program updates every 24 hours AND every time users start their computers. If updates are found, they are automatically downloaded and installed. (Default = Enabled).
- Show balloon messages – CCS can generate notifications when it is learning the activity of previously unknown components of trusted applications. The balloon messages appear in the bottom-right hand corner of the computer screen - just above the tray icons. (Default = Disabled).
Update Settings
- The updates tab lets you specify an alternate host from which endpoints should download updates. By default, updates are downloaded from https://download.comodo.com
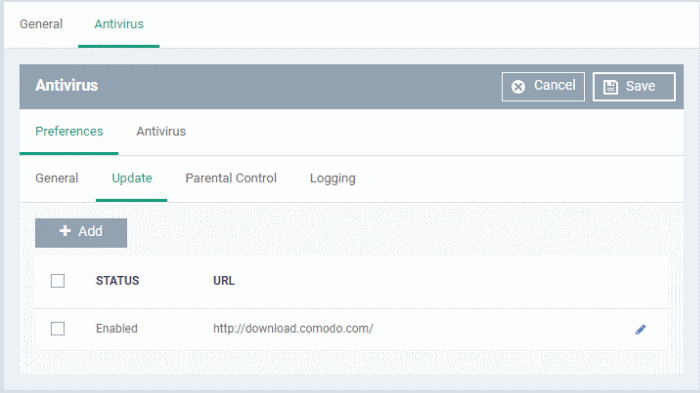
- You can add the URL of a different download host if required. For example, you may want to distribute the updates from a local server to conserve bandwidth.
- Click 'Add':
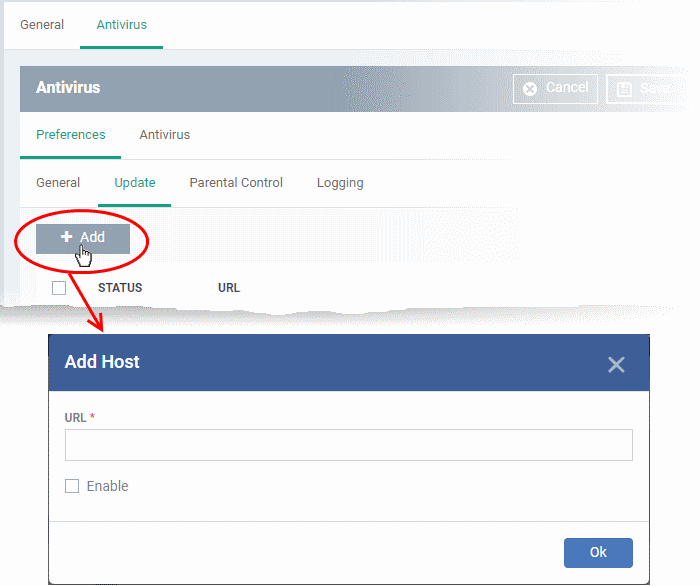
- Enter the URL / IP address of the host from which endpoints should collect antivirus updates. This can be a local, staging server that you have designated as your distribution server.
- Select the 'Enable' to activate the host
- Click 'OK' to apply your changes
- Repeat the process to add more hosts. Endpoints will download from the first server that has the update available. They will contact the next server in the list if the first server does not have the update, and so on.
Parental Control
- Parental control lets you password protect the CCS settings area on your endpoints. End-users will need to provide the password before they can access CCS settings. This prevents inexperienced users from making changes which could compromise the endpoint.
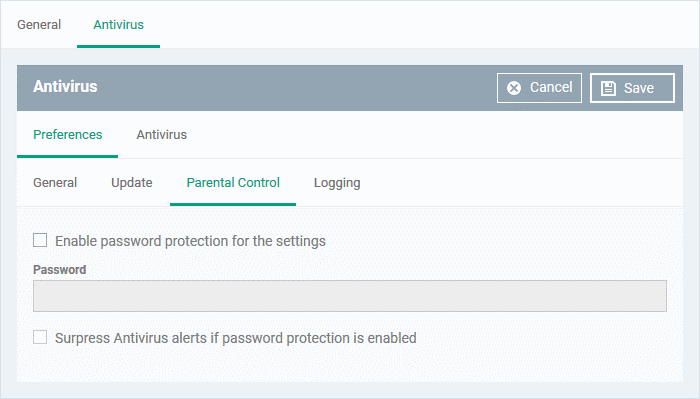
- Enable password protection for the settings - Activates password protection for all important CCS settings. Specify the password in the 'Password' field.
- Suppress Antivirus alerts if password protection is enabled - If selected, threats on the device are automatically blocked but no alert is shown to the end-user. This avoids situations where a user might click 'Allow' just to make an alert go away.
Logging
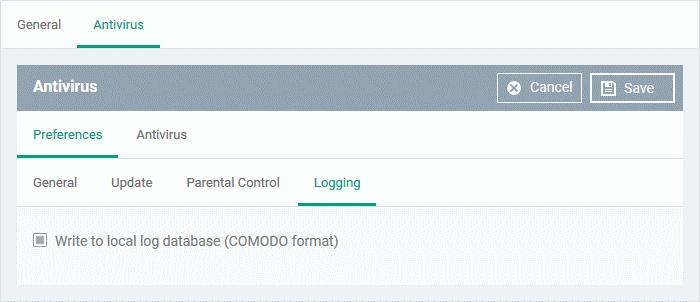
By default, CCS logs all virus events that occur on an endpoint. Users can view the log at ‘Antivirus Tasks’ > 'View Antivirus Events'.
- Write to local log database (COMODO format) - Deselect if you don't want CCS to store logs locally.
Antivirus
- Open the ‘Antivirus’ section of a profile as explained above
- Click the 'Antivirus' tab
- The antivirus tab has three sections:
- Scanner Settings - Configure settings that apply to real-time/manual/scheduled scans, and specify items to be excluded from virus scans.
- Scan Profiles - A scan profile tells CCS which files, folders, and drives should be included in the scan. You can use a scan profile in a manual/on-demand scan, or add it to a schedule. This area lists all existing profiles and lets you create new profiles.
- Scheduled Scans - Choose when you want the scan profile to run on managed devices.
Scanner Settings
The scanner settings area has four sections:
Realtime Scanning
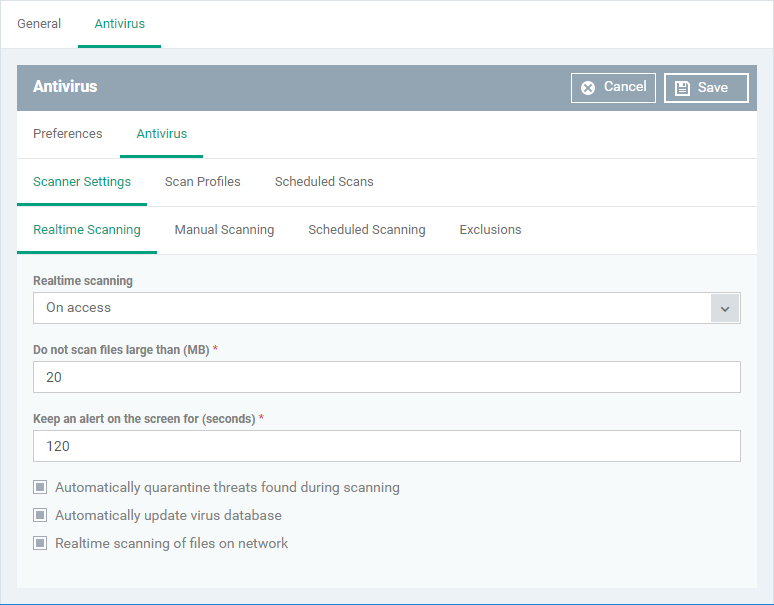
- Real time scanning
- On Access - Real-time protection is enabled. The scanner constantly monitors background processes for threats, and checks files whenever they are created, opened or copied. Threats are detected before they get a chance to execute (Default)
- Disabled - Real-time protection is switched off. Files are allowed to run without being checked for threats.
- Do not scan files larger than (MB) - The maximum file size that the antivirus should attempt to scan. CCS will not scan files larger than the size specified here. (Default = 20 MB)
- Keep an alert on the screen for (seconds) - How long threat notifications should stay on-screen if not dismissed by the end-user. (Default = 120 seconds)
- Automatically quarantine threats found during scanning – Any discovered threats are moved to a secure holding area where they can cause no harm. (Default = Enabled)
- You can review quarantined items and delete, ignore or restore them:
Device details interface - Click 'Devices' > 'Device List' > 'Device Management' > click the name of a Mac device > 'Antivirus' tab. See View items quarantined on a device if you need help with this
Security Sub-Systems interface - Click 'Security Sub-Systems' > 'Antivirus' > 'Quarantined Files' tab. See How to manage quarantined items in Endpoint Manager to read more
- Automatically update virus database - CCS will download any available updates at system start-up, and subsequently at regular intervals. (Default = Enabled).
- Realtime scanning of files on network - Activate or deactivate automatic scans of files on network drives.
- Enabled - CCS scans every file a user interacts with on a network drive, even if the file is not copied to the local machine.
- Disabled - Files on network drives are not scanned when a user interacts with them. This can save time by eliminating needless scans on write-protected files. If an endpoint doesn’t have the rights to delete/quarantine network files anyway, then there is little reason to scan them at this point. The file will still get scanned if it is copied to the local machine.
(Default = Enabled)
Manual Scanning
- A manual scan is one you run 'on-demand' on specific files, folder or drives.
- For example, you can launch a manual scan on your devices direct from Endpoint Manager. Go to 'Security Sub-Systems' > 'Antivirus' > 'Device List' > select a target device > Click the ‘Scan’ button.
- See 'How to run virus scans on devices from the security sub-systems menu' for help to do this.
- You can also run manual scans from the CCS installed on the Mac OS device. Click 'Antivirus' > 'Run a Scan' > select a scan profile > 'Scan'. See this help page if you need help to run on-demand scans on the local device.
- The Manual Scanning interface lets you select options for on-demand scans:
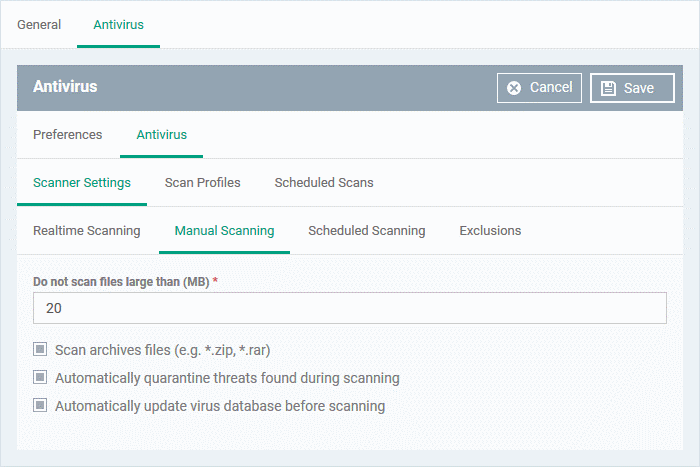
- Do not scan files large than (MB) - The maximum file size that the antivirus should attempt to scan. CCS will not scan files larger than the size specified here. (Default = 20 MB)
- Scan archive files - CCS scans archive files such as .ZIP and .RAR files. (Default = Enabled).
- Automatically quarantine threats found during scanning - Any discovered threats are moved to a secure holding area where they can cause no harm. (Default = Enabled)
- You can review quarantined items and delete, ignore or restore them:
Device details interface - Click 'Devices' > 'Device List' > 'Device Management' > click the name of a Mac device > 'Antivirus' tab. See View items quarantined on a device if you need help with this
Security Sub-Systems interface - Click 'Security Sub-Systems' > 'Antivirus' > 'Quarantined Files' tab. See How to manage quarantined items in Endpoint Manager to read more.
- Automatically update virus database before scanning - CCS will download any available updates at system start-up, and subsequently at regular intervals.
Scheduled Scanning
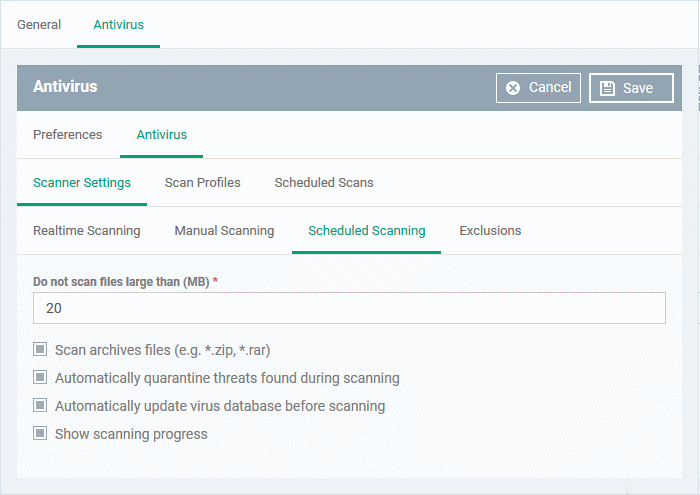
The preferences for scheduled scans are similar to manual scans as explained above, except:
- Show scanning progress - End-users will see a scan progress bar when the scan is running. (Default = Enabled)
Exclusions
- The 'Exclusions' tab lets you specify files and folders that should be ignored by the antivirus scanner.
- Any item you exclude will be skipped by ALL types of scan - real-time, on-demand and scheduled.
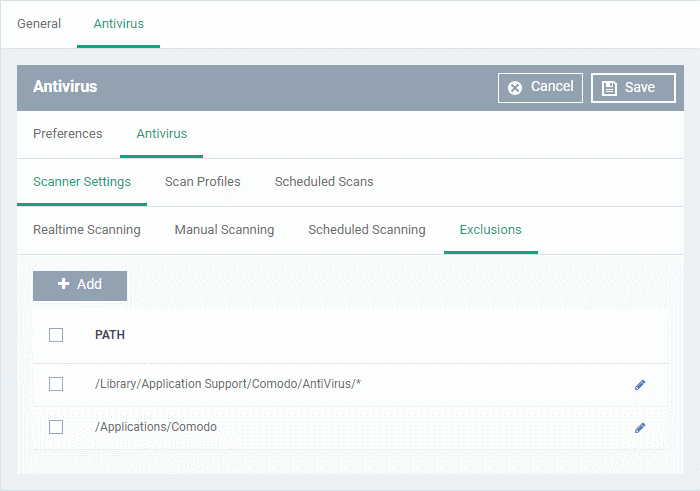
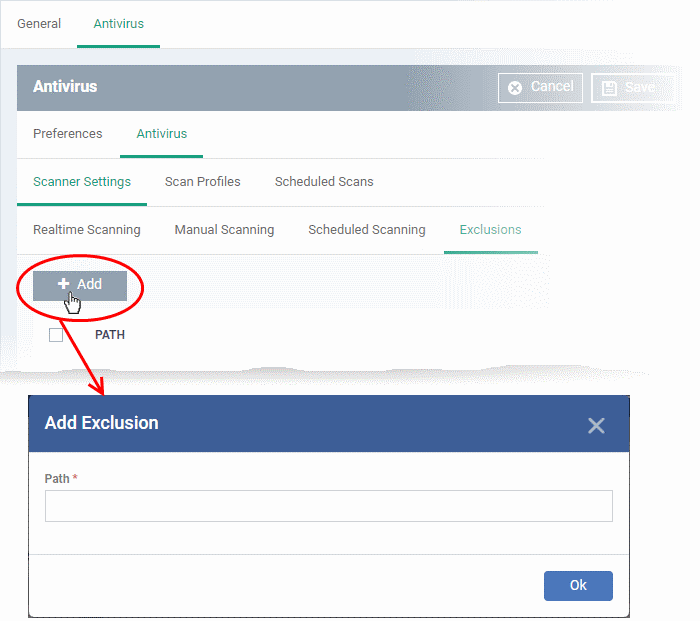
- Enter the full path of the item you want to exclude then click 'OK'.
- Repeat the process to exclude more items.
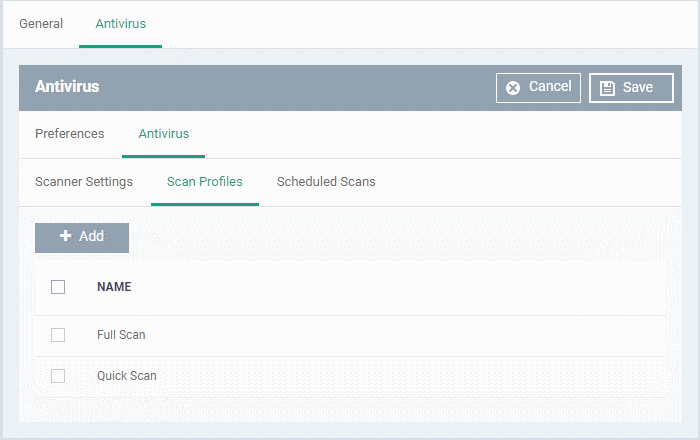
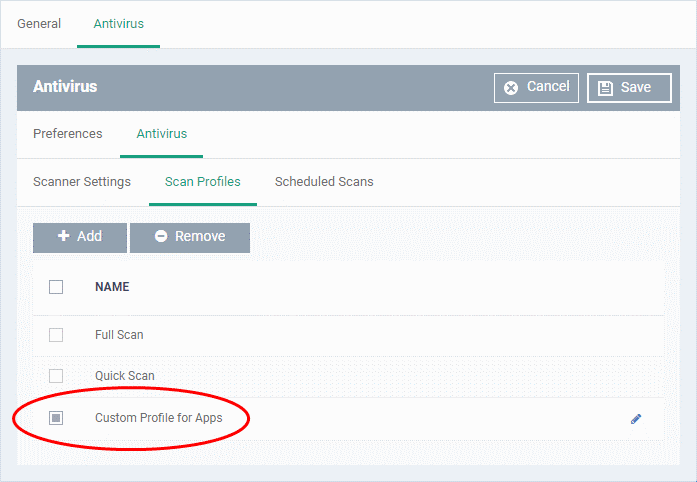
Scan Profiles
- Scan profiles tell CCS which files, folders or drives to scan on a device
- CCS ships with two default profiles – 'Full Scan' and 'Quick Scan'
- You can also create custom profiles which consist of specific items
- Any profiles you create here can be added to a scheduled scan
Create a scan profile
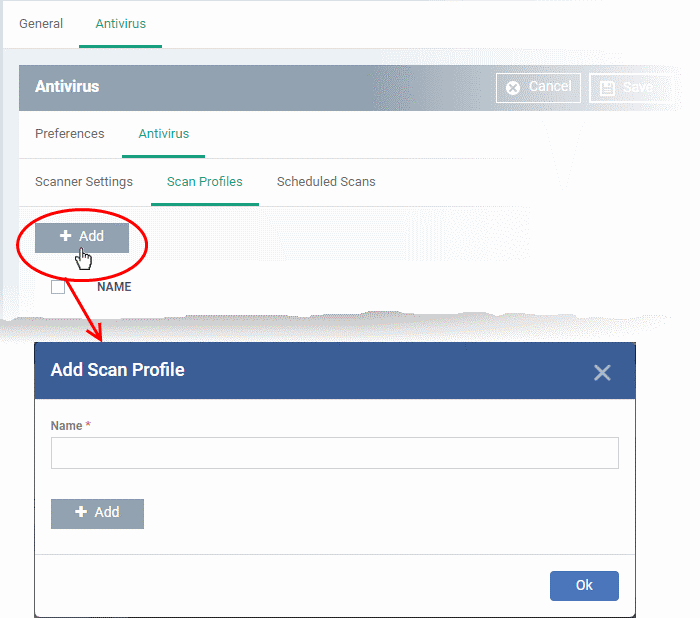
- Enter a label for the scan profile
- Click 'Add' to specify the item you want to scan. This can be a folder, drive, file or area
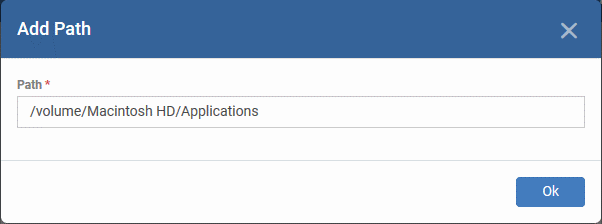
- Enter the path of the item you want to scan then click 'Ok'
- The path will be added to the profile as follows:
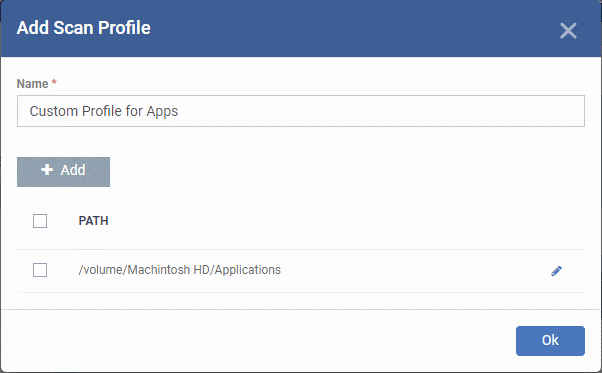
- Repeat the process to add more paths
- Click 'Ok'
The profile will be added to the list and can be selected as part of a scheduled scan.
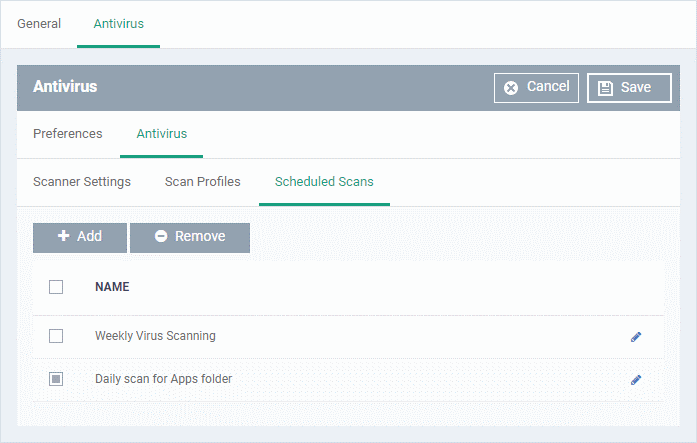
Scheduled Scans
- The highly customizable scheduler lets you set up recurring scans on managed devices. CCS scans the items in the scan profile at the times you specify in the schedule.
- You can create multiple schedules to take advantage of different scan profiles.
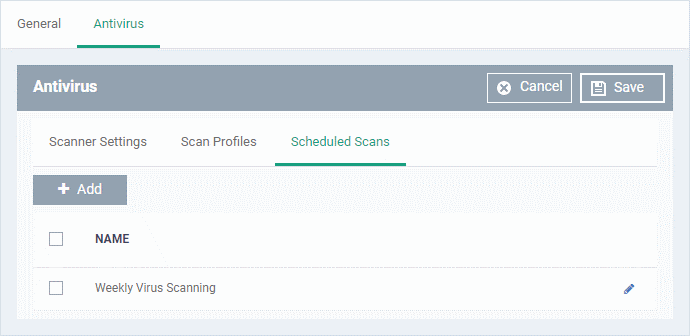
- Click 'Add' to create a new scheduled scan
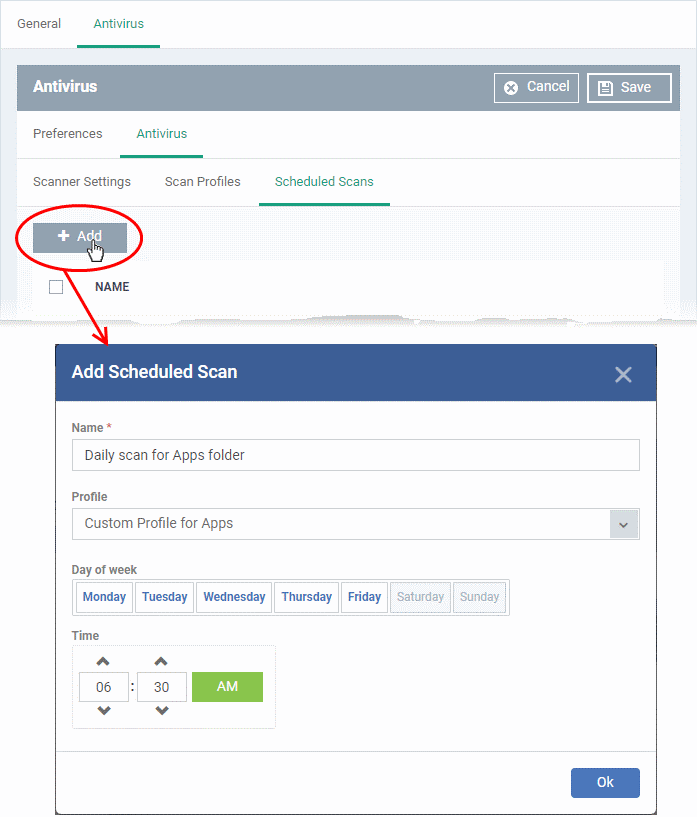
- Name - Label of the schedule. Pick something that describes the frequency and target of the schedule. For example, ‘Daily scan of the apps folder’, or ‘Weekly scan of sales team laptops’.
- Profile - Choose the pre-defined or custom scan profile you want to use in this scheduled scan. All profiles listed in the 'Scan Profiles' tab will be available in the drop-down.
- Day of week - Select the days of the week on which the scan should run.
- Time - The time the scan should start.
Click 'OK'
View items quarantined on a device
Click 'Devices' > 'Device List' > 'Device Management' > click the name of a Mac device > 'Antivirus' tab.
- The 'Antivirus' tab shows all files currently quarantined on the device. Endpoint Manager periodically synchronizes with managed devices to collect and show history of all files in different times on devices.
- You analyze the trustworthiness of the item and can restore files on the device or remove the files from the device. You can also set an admin rating to the files from this interface.
View and manage quarantined files
- Click 'Devices' > 'Device List'
- Click the 'Device Management' tab
- Select a company or a group to view their devices
Or
- Select 'Show all' on the left to view every device enrolled to EM
- Click the name of a MAC device
- Click the 'Antivirus' tab > 'Quarantined Files'
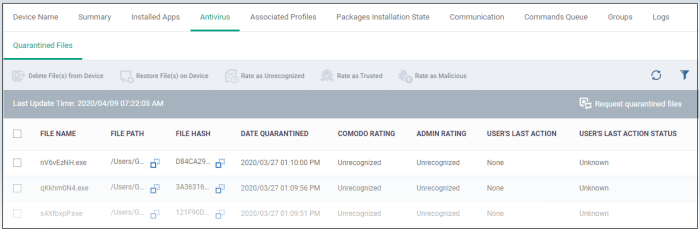
- Click ‘Request quarantined files’ on the right to manually refresh the list.
File Name - The file that was moved to quarantine.
File Path - The location on which the file is saved on the device
Hash - The SHA1 hash value of the quarantined file
Date Quarantined - Date and time at which the malware was identified and quarantined on the device.
Comodo Rating - The file's trust level as rated by CCS.
Admin Rating - The trust rating of the file as set by the administrator. Files can be rated as trusted, malicious or unrecognized.
User’s last action – The response to the quarantined item by the admin.
User’s last action status – The status of the response. The possible statuses are:
- Operation failed. Try again.
- Command is queued.
- Command has been sent to the device.
- Select an item and click 'Delete File(s) From Device' to permanently remove the item from the device
- Select an item and click 'Restore File(s) on Device' to move the item from the quarantine to its original location
- Select an item and click 'Rate as unrecognized', 'Rate as Trusted' or 'Rate as Malicious' to set the corresponding rating to the file
A confirmation is shown and the changes are applied on the device.
- Files rated as 'Malicious' stays in quarantine on the device.
- Files rated as 'Unrecognized' will be restored to their original locations on the device. Future AV scans may flag them as 'malicious' again.
- Files rated as 'Trusted' will be restored to their original locations in the device. These files will be white-listed and skipped by future antivirus scans.
Further reading:
How to run virus scans on devices from the security sub-systems menu
How to view antivirus scan results and quarantined files on a device in Endpoint Manager
How to manage quarantined items in Endpoint Manager
How to configure antivirus settings in a Linux profile
How to configure antivirus settings in a Windows Profile