Open Endpoint Manager > Click 'Devices' > 'Device List' > 'Device Management'
- Endpoint Manager lets you browse files and folders on managed devices and transfer items between the remote and local computers.
- You can also remotely create, rename, and delete unwanted files and folders on the remote endpoint.
There are two ways to transfer and manage files in endpoint manager:
The Remote Tools option
Prerequisite - You need to add a remote tools section to the profile active on the target device. Please follow these steps if you haven’t done so already:
- Click ‘Configuration Templates’ > ‘Profiles’ > click the name of the appropriate profile > Click ‘Add Profile Section’ > select ‘Remote Tools’.
- Make sure all remote options are set to ‘ON’. Click ‘Save’ to apply the setting to the remote endpoint.
- See this wiki if you need more help to add a remote tools section.
Open the 'File Explorer' interface
- Login to ITarian
- Click 'Applications' > 'Endpoint Manager'
- Click 'Devices' > 'Device List'
- Click the 'Device Management' tab in the top-menu
- Select a company or a group to view just their devices
OR
- Select 'Show all' to view every device enrolled to EM
- Select the Windows device you want to view
- Click 'Remote Tools' > 'File Explorer'
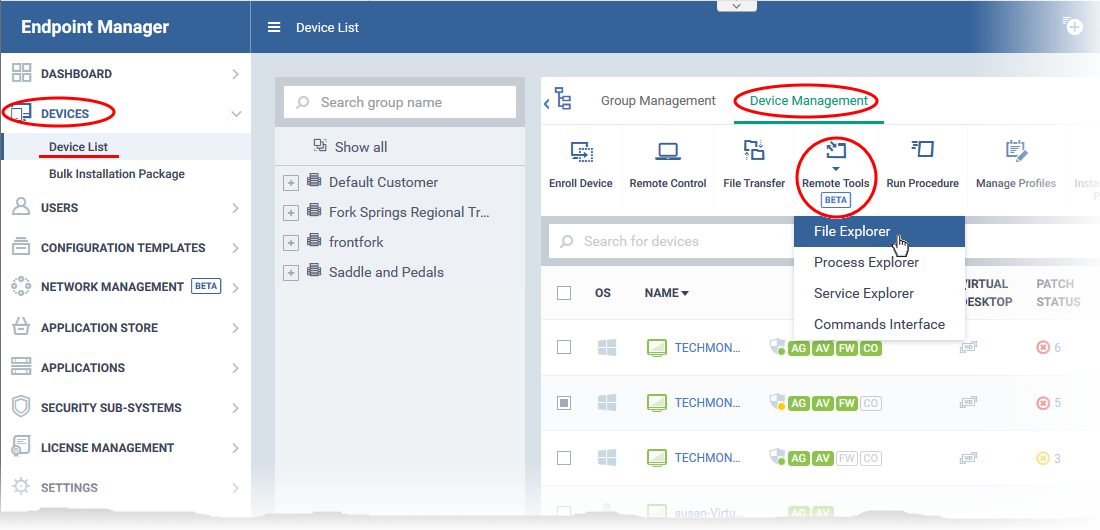
- Alternatively, click the name of the device to open 'Device Details' > select 'Remote Tools' > 'File Explorer' from the options at the top.
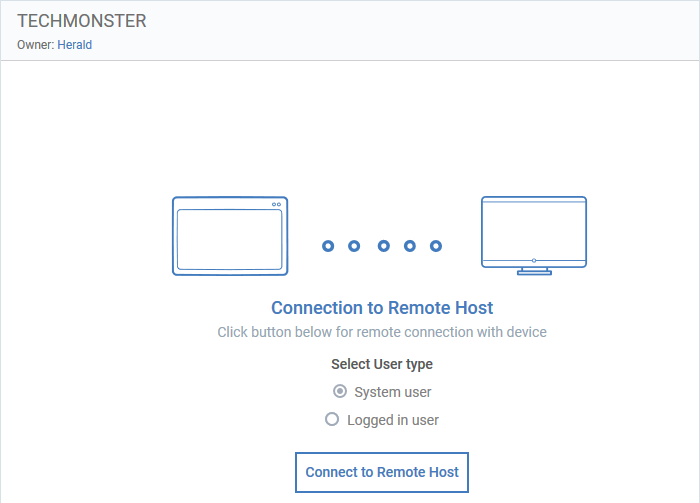
- Select user type – Choose the user account under which you want to remotely manage files on the target device.
- Click 'Connect to Remote Host' to establish the connection.
A request message may be shown to the end-user if so configured:
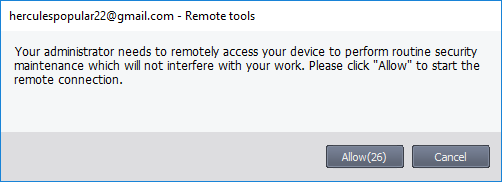
- You can configure these request messages in the 'Remote Tools' section to the profile active on the device. See this wiki if you need help with this.
- The file explorer interface opens once the connection is accepted:
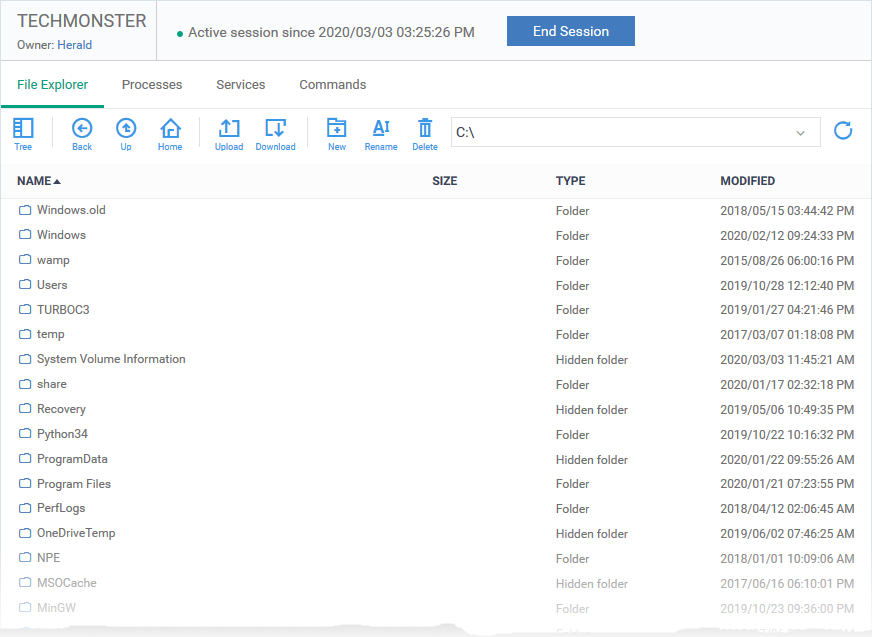
- Use the drop-down at the upper-right to choose a drive/partition on the remote device.
- Folders and files, including hidden items, are shown in list view
- Click the tree icon
 at the top-left to change to the tree view.
- You can browse to any path by double-clicking on a folder
- You can also enter a path in the field at the top of the interface.
The controls above the list let you navigate the remote file system:
|
|
-
|
Switch between tree view and list view
|
|

|
-
|
Return to the previous location
|
|

|
-
|
Go one level up the folder tree
|
|

|
-
|
Go to the root folder of the selected drive/partition
|
|

|
-
|
Transfer files/folders from your computer to the remote device.
|
|

|
-
|
Copy selected files/folders to your computer from the remote device.
|
|

|
-
|
Create a new folder on the remote device.
|
|

|
-
|
Set a new name for a file/folder on the remote device.
|
|

|
-
|
Remove unwanted items from the remote device.
|
|

|
-
|
Refresh the content of the current folder.
|
Download files / folders from a remote device to your computer
- Browse to the file/folder you want to download from the remote device
- Select the item you require then click download. Right-click to select multiple items.
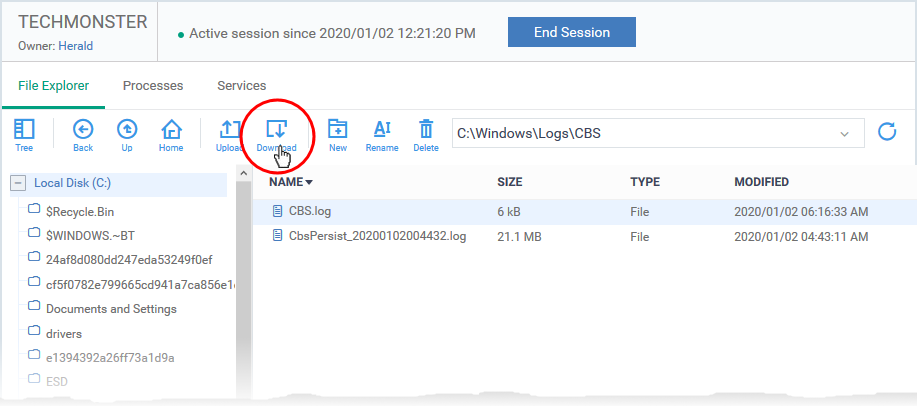
- The file/folder is copied to your computer.
Note: The max. file size you can download is 50 MB.
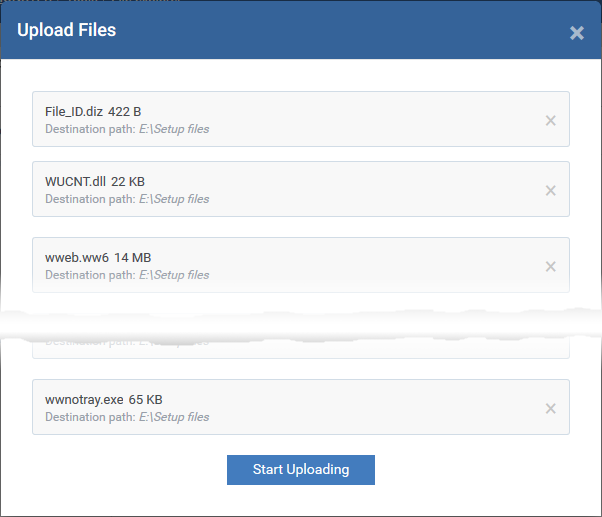
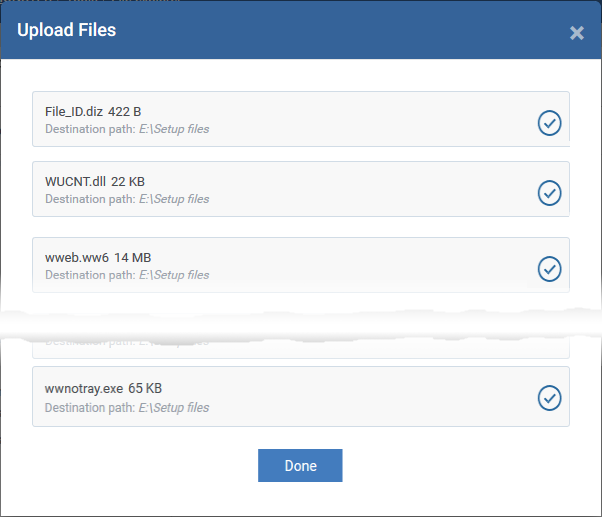
Upload files / folders to the remote device
- Click the 'Upload' icon in the control bar:
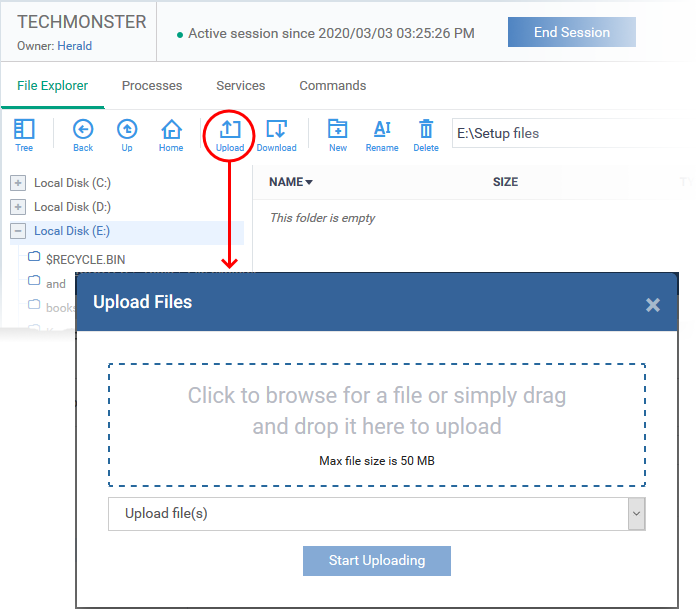
- Select 'Upload file(s)' or 'Upload folder(s)' from the drop-down
- Drag-and-drop files/folders into the box, or click inside the box to browse to an item
- Note: The max. file size you can upload is 50 MB
Create a new folder on the remote device
- Browse to the location on the remote device where you want to create the new folder
- Click the 'New folder' icon:
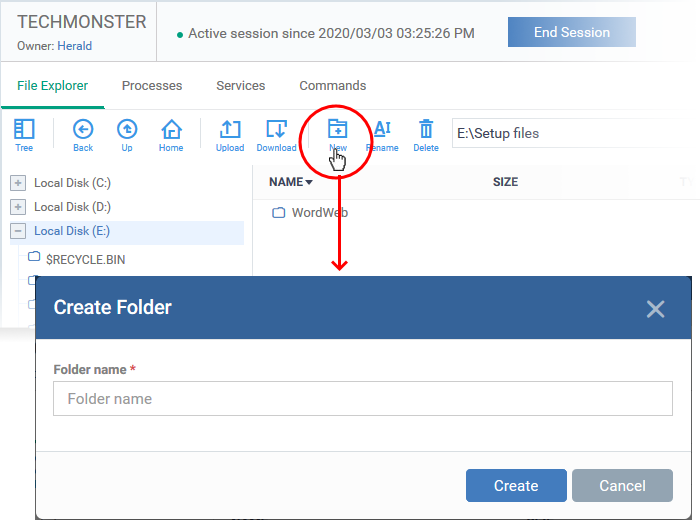
- Enter a name for the folder then click 'Create'.
- The folder is added to the location you chose. You can upload files from your computer to the new folder. The endpoint user can also save files to the new folder.
Rename files and folders on the remote device
- Navigate to and select the item you want to rename on the remote machine
- Click the 'Rename' icon in the control bar:
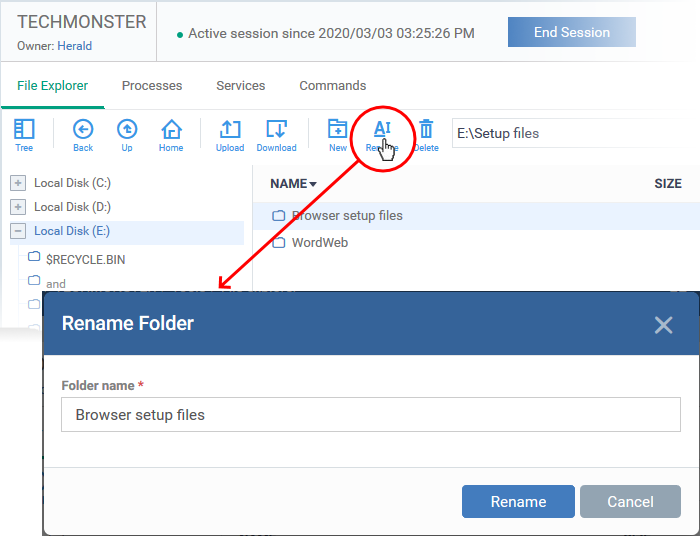
- Enter a new name for the item
- Click 'Rename'
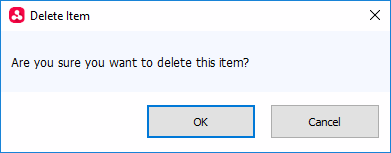
Delete folder / file from the Remote Device
- Navigate to and select the item you want to remove
- Click the 'Delete' icon in the control bar:
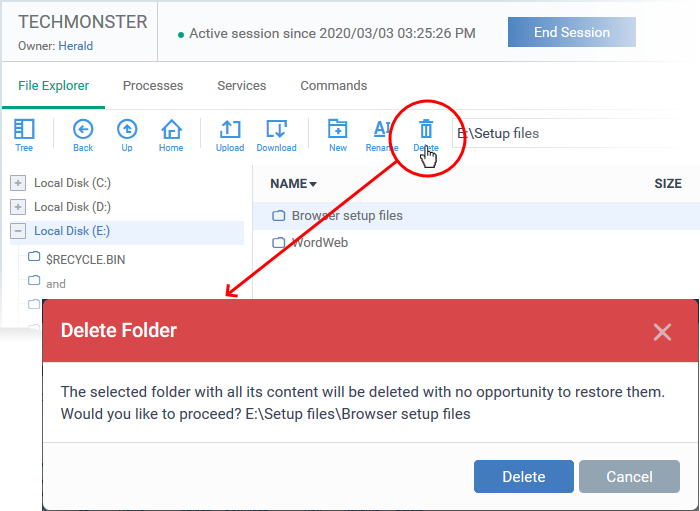
- Click 'Delete' to permanently remove the item from the remote device
Notification
The device user can view your file activities by clicking the down arrow in the session notification box:
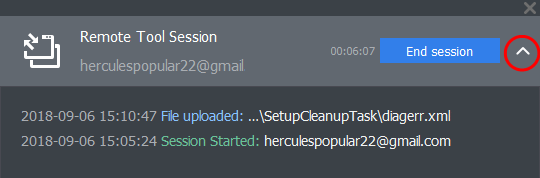
Endpoint Manager logs your remote browsing sessions in 'Dashboard' > 'Audit Logs'.
Use the Remote Control app
- The remote control app lets you connect to Windows and Mac OS devices to solve issues, install third-party software and run system maintenance.
- The tool also lets you perform file operations on remote devices.
- You can download the tool from either of these interfaces:
- Endpoint Manager - Click 'Devices' > 'Bulk Enrollment Package' > Select the 'Remote Control by ITarian' tab > Click 'Download'
- ITarian - Click 'Tools' > 'Remote Control by ITarian' tile > Click 'Download'
- Once installed, you can start the application from the Endpoint Manager interface or directly from your desktop.
- You need to login to the tool with your ITarian username and password.
- See this wiki if you need more help with the tool
Use the remote control application to transfer files / folders
Prerequisite - You should have enabled remote file actions in the 'Remote Control' section of the device profile. See this wiki if you need help with this.
1. From Endpoint Manager
- Login to ITarian
- Click 'Applications' > 'Endpoint Manager'
- Click 'Devices' > 'Device List'
- Click the 'Device Management' tab in the top-menu
- Select a company or a group to view just their devices
OR
- Select 'Show all' to view every device enrolled to EM
- Select the Windows or Mac OS device with which you want to interact
- Click 'File Transfer'
The remote control application starts:
- Login with your ITarian username and password.
- The file transfer session starts.
Next: The file management interface
2. Start from the desktop
- Double click the desktop shortcut
 or the system tray icon to open the login screen
- Login with your ITarian username and password.
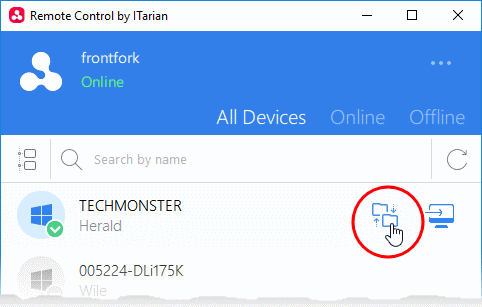
- Move your mouse over an endpoint and click the file transfer icon on the right:
The file management interface
The interface shows the file systems of the local and remote computers in adjacent panes:
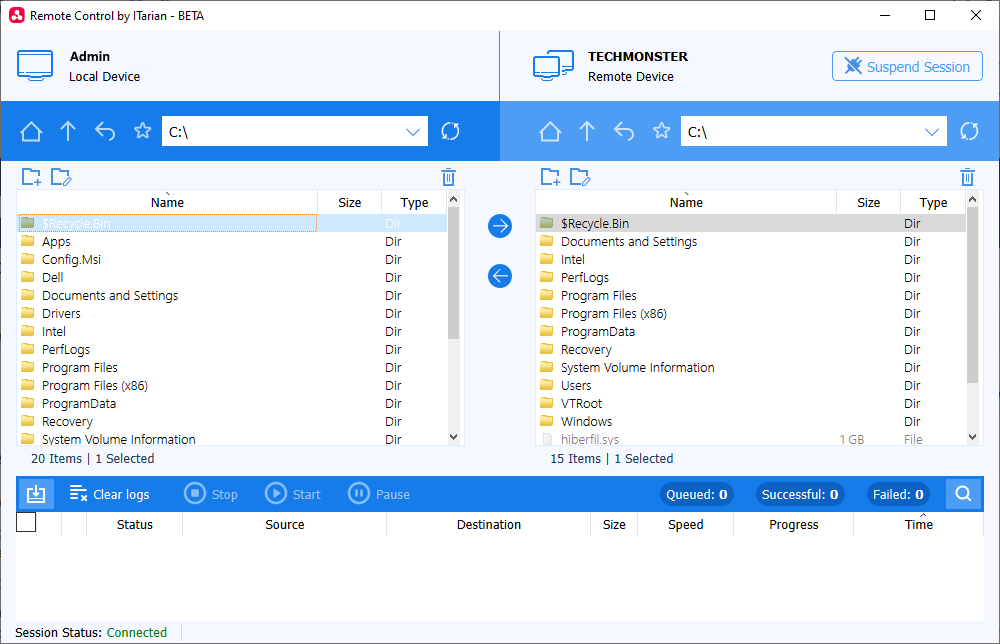
You can transfer files, create folders, rename folders and more:
|

|
-
|
Go to the root folder of the selected drive/partition
|
|
|
-
|
Go one level up
|
|

|
-
|
Return to the previous location
|
|

|
-
|
Add current folder to favorites.
- You can add folders you often access to favorites
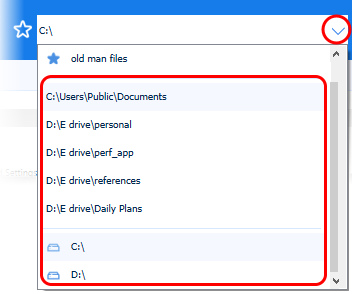
- Click the address bar to access your favorite folders.
- See Add and manage favorites if you need more help.
|
|

|
-
|
Folder address bar
Use the drop-down to view recently accessed items and your favorites.
Recent folders shows the last five folders you accessed.
|
|

|
-
|
Transfer files from the local device to the remote device
|
|
|
-
|
Transfer files from the remote device to the local device
|
|

|
-
|
Remove files / folders
|
|

|
-
|
Create a new folder
|
|

|
-
|
Rename a file / folder
|
|

|
-
|
Refresh the content of the current folder.
|
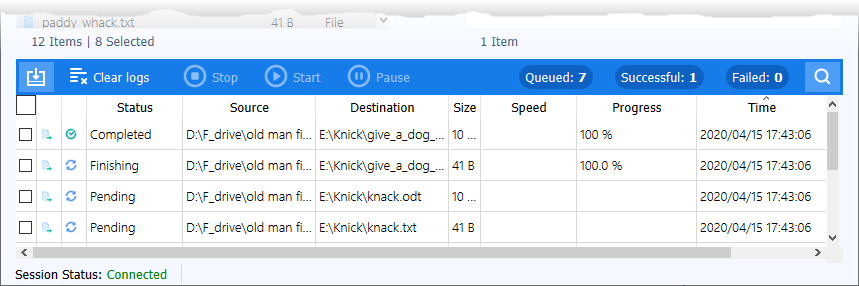
The lower pane shows the progress of your transfers.
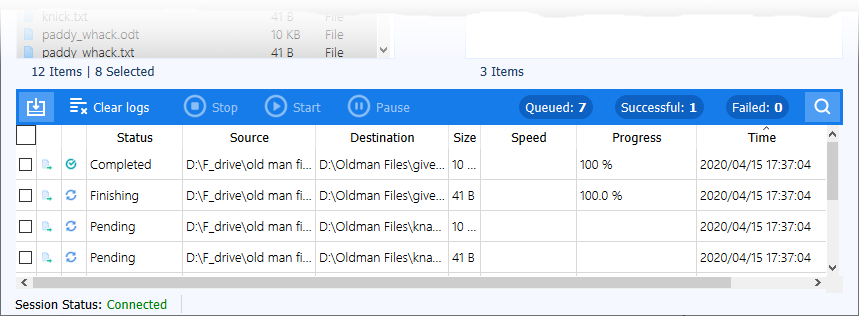
You can pause / resume or cancel file transfers in progress, using the controls at the top. Click the following links for more details:
Transfer Files between Local and Remote Device
- Copy items from local computer to remote computer
- Browse and select the items on the local computer in left pane
- Browse to the folder where you want to save the item in the remote device, in the right pane
- Click 'Send' (right arrow)
Or
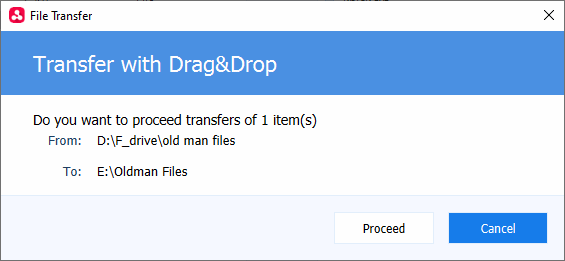
- Drag-and-drop the items from the left pane to the right pane
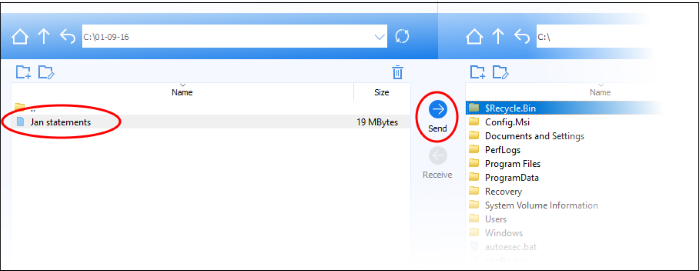
- Copy items from the remote device to the local computer
- Browse and select the items on the remote computer in left pane
- Browse to the folder where you want to save the item in the local computer, in the right pane
- Click 'Receive' (left arrow)
Or
- Drag-and-drop the items from the right pane to the left pane
If a file with the same name exists at the destination, then you have the choice to overwrite or rename:
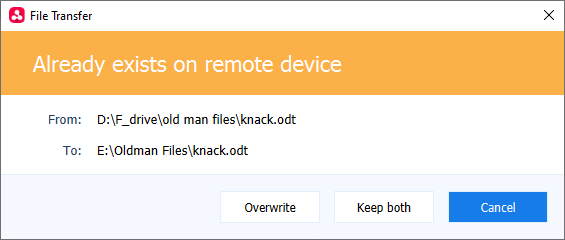
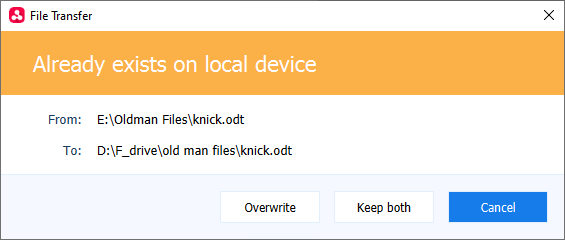
- Overwrite – The existing file is replaced by the copied file on the destination folder
- Keep both – The copied file is saved on the destination without affecting the existing file. The name of the copied file is suffixed with the version number. For example 'knack(1).odt', 'knick(2).odt'
You can view the status of the transfer in the lower pane.
Note - You can send and receive files at the same time. Select a file in local device and in remote device. Click 'Send' and 'Receive' buttons.
Create a Folder
- Click the folder icon on the local or remote device
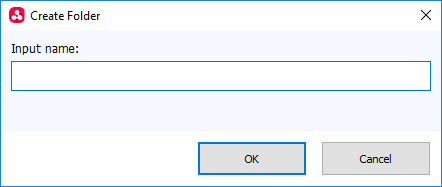
- Enter folder name and click 'OK'
Edit a Folder / File Name
- Select a folder/file and click the edit icon in the local or remote device.
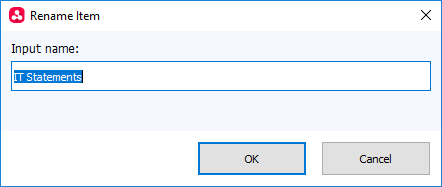
- Update the name of the folder/file and click 'OK'
- Alternatively, just click on an item and rename it.
Delete Folders / Files
- Select a folder/file and click the trash can icon
 in the local or remote device
Pause / resume a file transfer
You can temporarily stop queued and on-going file transfers and restart them as required.
Pause a file transfer
- Select a file transfer in queue or in progress from the lower pane and click 'Pause' to temporarily stop it
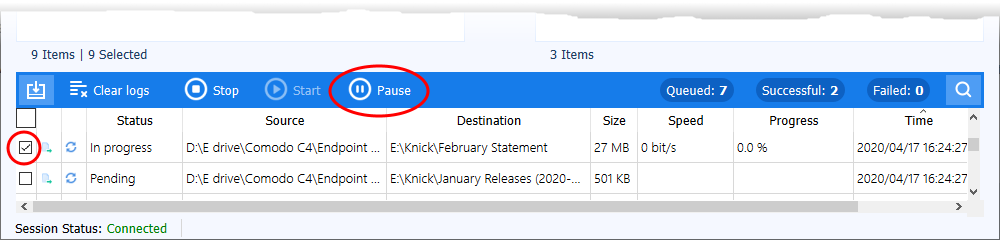
The status of the file transfer is stopped and its status is changed to 'Paused'.

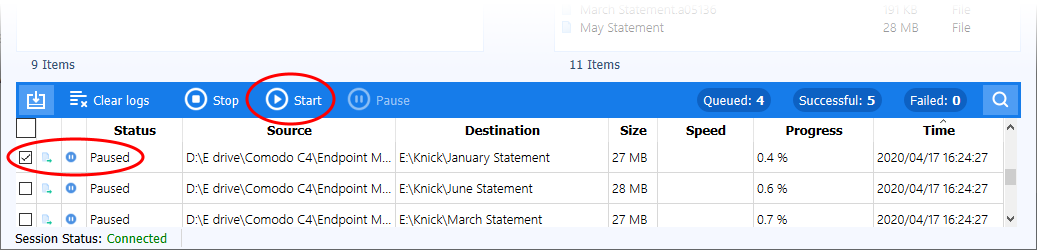
Resume a File Transfer
- Select a paused file transfer from the lower pane and click 'Start' to restart it
Stop / Cancel a File Transfer
- Select an on-going file transfer and click 'Stop' at the top
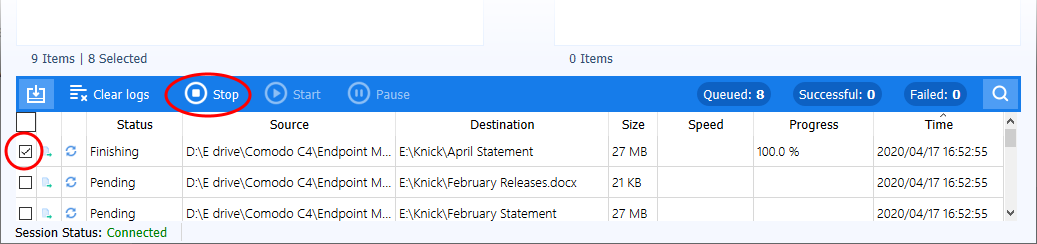
The transfer is stopped and canceled. You can restart the file transfer by selecting it from the lower pane and clicking 'Start'.
Add and manage favorites
- You can add folders you access often to your favorites for quick access
- Click the address bar to view your favorite folders.
- You can add up to five folders to favorites
Add favorites
- Browse to the folder you want to favorite. The folder path is shown in the address bar.
- Click the start icon
 at the left of the address bar:
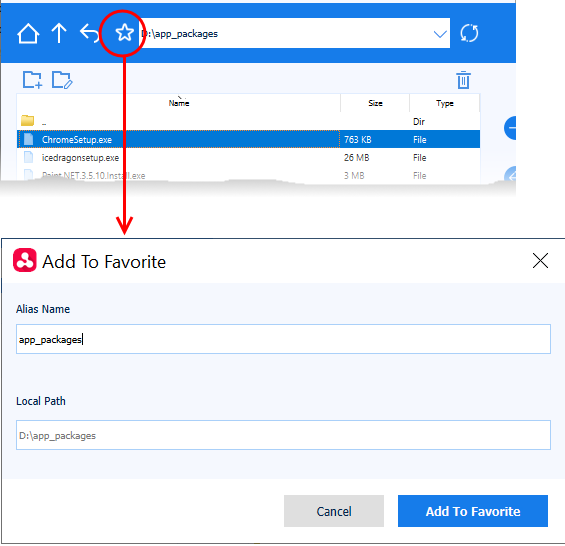
- Alias Name - Enter a friendly name for the folder to easily identify it in the drop-down
- Local path - Auto-populated with the path of the chosen folder
- Click 'Add to Favorite'
The folder is added and available for quick access from the address bar drop-down:
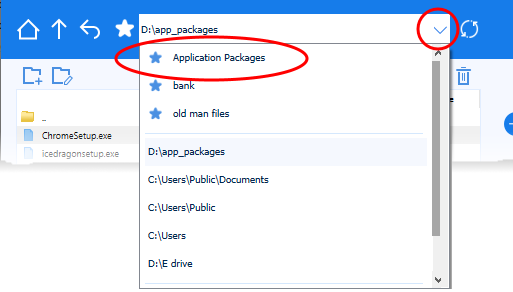
- Repeat the process to add more favourites
Note: You can add a maximum of five folders to the favourites list.
Suspend and resume file transfer session
- Click the 'Suspend Session' button at the top right to temporarily stop an on-going file transfer session
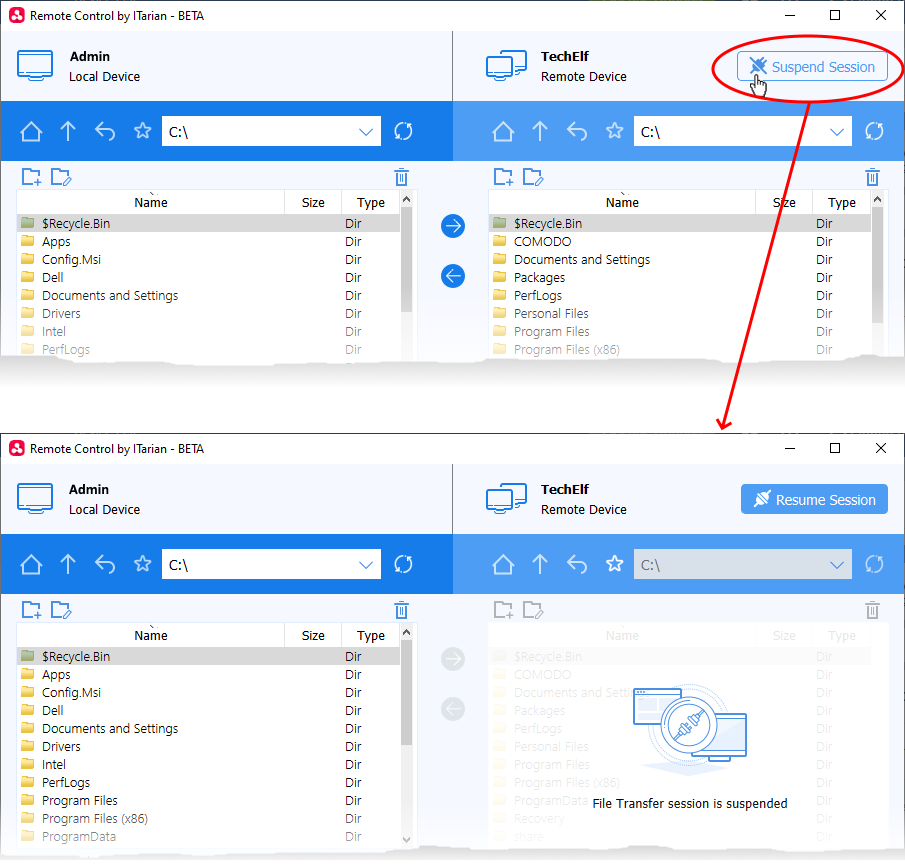
- Click 'Resume Session' at top right to restart the session.
- All individual file transfers are paused when you suspend a file transfer session.
- Individual file transfers are resumed from where they were stopped when the session is resumed.
- File transfer sessions can be paused for a maximum of 2 hours, after which the session is terminated.